A friend of mine texted me last summer, panicking about a batch of pale ale that tasted like a bag of cheap buttered popcorn. He'd pitched US-05, kept the bucket in his garage, and fermented it at what he thought was 18 °C. The bucket was actually sitting at 24 °C. That's the whole problem in one sentence: the temperature on your thermometer is not necessarily the temperature of your beer, and fermentation temperature control for beginners is mostly about learning that gap the hard way.
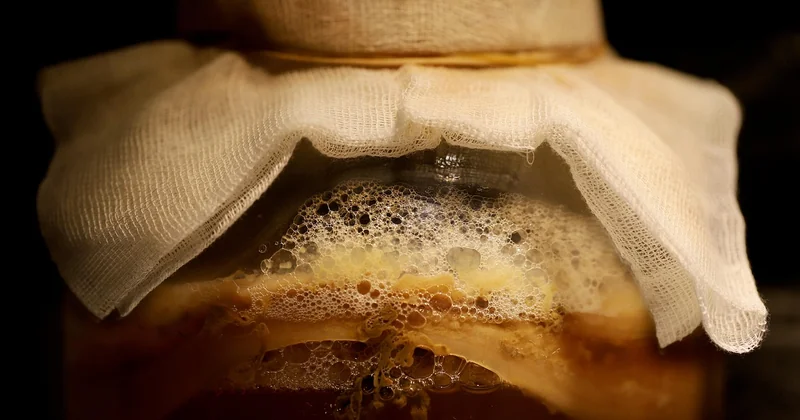
Yeast doesn't care what you planned. It cares what it's sitting in. A fermenting bucket generates its own heat, and during the first 48 to 72 hours a vigorous batch can run 3 to 6 °C above ambient. That's the delta nobody tells you about, and it's the reason so many new brewers make drinkable beer that still tastes slightly off in a way they can't describe.
Key Takeaways
- Your fermentation vessel runs warmer than the room during active fermentation, sometimes by 5 °C or more.
- Ale yeast typically wants 18–22 °C; lager yeast wants 8–12 °C; that's a range, not a single magic number.
- The first 72 hours matter most, because that's when yeast produces most of the flavour compounds.
- You do not need a converted fridge to start. A water bath and frozen bottles get you surprisingly far.
- Stirring a fermenting batch is not a thing. Stirring your mash is a different process entirely.
- Stable temperature beats "correct" temperature every time. Yeast hates swings more than it hates a few degrees off.
Why fermentation temperature control decides what your beer tastes like
Yeast during fermentation is not just converting sugar to alcohol and CO2. It's also throwing off esters, higher alcohols, and sulfur compounds, and the balance of those depends heavily on how warm it runs. Push an English ale strain too hot and you get banana and pear notes that belong to a hefeweizen. Run a clean American ale too cold and you stall it, or worse, end up with diacetyl—that buttery slickness my friend ran into.
A small number worth remembering: fermentation is exothermic. It releases heat. And because a 20-litre bucket has a large volume relative to its surface area, that heat doesn't leave quickly. The core of the liquid stays warm even if the air around it is cool.
The ambient temperature trap
Here's where beginners get burned. You check the room temperature, it says 19 °C, you think you're in ale range. Meanwhile the bucket is churning away at 24 °C and quietly producing a fusel-heavy mess.
The fix is embarrassingly cheap: tape a thermometer to the side of the bucket, or better, drop a sanitised probe into the liquid itself if you have one. If you're relying on the wall thermometer, assume you're off by several degrees.
Honestly, this is the single most useful habit I picked up in my first year. It cost me nothing and instantly explained three batches of mediocre beer.
How to control temperature during fermentation
You have options ranging from almost free to proper homebrewery, and the right one depends on your climate and how many batches you plan to brew a year.
Low-cost approaches that actually work
If you're brewing in a warm flat during summer, a water bath is your best friend. Put the fermenter in a large tub, add water up to about two-thirds of the bucket height, and rotate frozen water bottles in and out. With two or three bottles swapped twice a day, you can hold a bucket several degrees below room temperature.
- A wet towel or old t-shirt draped over the fermenter, with the bottom sitting in water, gives you evaporative cooling—maybe 2–3 °C below ambient.
- A cool corner, basement, or garage floor that stays steady is worth more than you'd think.
- Frozen bottles rotated twice daily in a water bath for the first 72 hours is where most beginners should start.
- Insulating a bucket with a sleeping bag won't cool it, but it will smooth out swings.
When it's time to build a chamber
Once you're brewing every couple of weeks, an old fridge with an external temperature controller (the kind with a probe and a relay) becomes the obvious investment. Set the probe in the fermenter, set the target, and let the fridge do the work. A fermentation temperature control kit will typically land you between a modest fridge and a real chest freezer conversion, and if you're handy you can wire it yourself in an afternoon.
What it doesn't do: fix a bad pitch, correct an underattenuated wort, or make a stout taste like a stout. It controls temperature. That's it.
A reference chart for common yeast types
Ranges vary by strain, so treat this as a starting map rather than gospel. Always check the packet.
| Yeast type | Typical range | Notes |
|---|---|---|
| Clean American ale | 17–20 °C | Keep it cool for crisp, neutral character |
| English ale | 18–22 °C | Warmer end brings out fruity esters |
| Belgian ale / saison | 20–26 °C, sometimes higher | These are meant to run hot and funky |
| German lager | 8–12 °C | Needs real cooling; diacetyl rest around 14–16 °C at the end |
| Mead / wine yeast | 15–22 °C | Cooler end keeps it clean; warmer pushes esters |
Notice the overlap. There's no universal "perfect" number—only the right range for the strain you've chosen.
What is the perfect temperature for fermentation?
There isn't one, and anyone who tells you otherwise is selling something. The perfect temperature is whatever the yeast packet says, held consistently. That's the whole answer.
Ales in the 18–22 °C band is a comfortable default for beginners, because most homes sit somewhere near that already and the margin for error is generous. Lagers demand genuine cooling equipment, which is why so few beginners start there. Ethanol fermentation in general (wine, mead, and beyond) runs a bit cooler than most ales—15–20 °C keeps esters under control and lets the fruit or honey speak.
The catch? "Consistently" is doing a lot of work in that sentence. A 3 °C swing over a day will stress yeast more than a stable 23 °C will. Stability first, precision second.
What is the 3:30-300 rule for beer?
You've probably seen this floating around forums. The idea is a shorthand for beer freshness and shelf life: three weeks for a fresh pale, thirty days for something moderately hopped, three hundred for a bottle-conditioned high-gravity beer that benefits from ageing.
It's a rough heuristic, not a scientific law. Treat it as a nudge rather than a rule. A heavily dry-hopped IPA is at its best days after packaging, not weeks, and no rule changes that.
Should you stir your mash while fermenting?
Careful—these are two different stages of the process, and mixing them up will lead you somewhere strange.
During the mash, yes, you stir. You're mixing crushed grain with hot water to convert starches to sugar, and gentle stirring helps you hit an even temperature without creating a stuck grain bed. Stir with purpose but don't whip it—you'll oxygenate and risk a stuck sparge.
During fermentation, you don't stir at all. The yeast does the mixing for you, and any agitation just risks introducing oxygen at a point where you really don't want it. Once active fermentation kicks off, leave the bucket alone.
So: stir your mash, never your ferment. That's the rule.
The mistakes I made, so you don't have to
My first summer brewing, I lost four batches in a row to a "banana bomb" flavour. I blamed the yeast. I switched strains three times. The real issue was that my fermentation cupboard sat next to a radiator, and the ambient swing was 6 °C over 24 hours.
Once I moved to a water bath and stopped trusting the wall thermometer, the problem vanished. Same yeast, same recipe, completely different beer. That's the lesson I keep coming back to: fermentation temperature control is less about precision than about removing surprises.
Second mistake: I tried to cool a lager in a fridge set to 10 °C without a probe in the fermenter. The air temp was 10 °C, the wort was 14 °C, and the yeast stalled. Lesson learned the expensive way.
A final thought before you pitch
When you crack the lid on your next batch, pay attention to the first 48 hours more than anything else. That's when the yeast is doing its loudest and most consequential work, and it's the window where a few frozen bottles or a towel will make the biggest difference.
You don't need a lab. You don't need to be precise to the decimal. You need to know roughly what your strain wants, know that your bucket is warmer than the room around it, and give yourself tools to nudge—not fight—the temperature. Everything else follows.
And if a batch still tastes a bit off? Good. You now have a reason to brew the next one.