You crack open a bag of Citra, drop 100 grams into the fermenter, seal it up, and two weeks later the beer tastes like wet cardboard with a hint of onion. Or worse: it's grassy, harsh, and the tropical fruit you were chasing never showed up. Sound familiar?
The problem is almost never the hop. It's the dry hopping technique—the timing, the temperature, the oxygen exposure, and the way you handle the additions. Get those right and a homebrew can hit commercial NEIPA levels of aroma. Get them wrong and you burn through expensive hops for nothing.
Below is what actually works, drawn from brewing on my own system, plus the parts most guides skip: oxygen control, double dry hopping, and how long to dry hop before you start pulling out the character you paid for.
Key Takeaways
- Timing beats quantity. A 48-hour dry hop at the right moment outperforms a 7-day soak almost every time.
- Oxygen is the real enemy, not hops. Every gram of oxygen you introduce during dry hopping steals aroma you can't get back.
- Pellets and whole leaf behave differently—pellets give more extraction per gram, whole leaf drops clearer and clogs less.
- Double dry hopping works, but only if you drop the first charge before it turns grassy.
- Temperature matters. Dry hopping warm extracts faster; dry hopping cold gives a cleaner result.
Dry hopping techniques explained: what actually happens in the fermenter
Dry hopping is adding hops to beer after the boil, usually during or after primary fermentation. The point is simple: you keep the volatile oils (myrcene, linalool, geraniol) that evaporate within minutes at boil temperatures. You're trading bitterness for aroma.
But here's what most homebrewers miss. Those oils don't just sit in the beer. They interact with yeast, they bind to proteins, and they drop out of suspension. The dry hopping technique you choose determines how much of that aroma survives to the glass.
The chemistry in plain terms
Three things happen when hops hit the fermenter:
- Extraction—the oils and resins dissolve into the beer. Warm beer extracts faster, cold beer slower.
- Biotransformation—active yeast converts some hop compounds into new ones. This is why dry hopping during active fermentation can turn a grassy hop into a peach bomb.
- Adsorption—some aroma compounds stick to yeast cells and drop out when the yeast flocculates. More yeast in suspension means more aroma lost when it settles.
That third one is why dry hopping after the yeast has dropped gives a different result than dry hopping in the middle of fermentation. Same hops, same amount, completely different beer.
Why timing changes everything
I learned this the hard way on a pale ale I brewed with a colleague. We split the batch: one half got dry hopped at day two with active yeast, the other at day six once fermentation had slowed. Identical hop bill, identical weight. The day-two half was fruitier, softer, and my tasting notes read "mango and stone fruit." The day-six half was sharper, more resinous, and honestly a little flat in the nose.
Same hops. Same beer. Different timing.
What is the best dry hopping technique for beer?
The best dry hopping technique for most homebrews is a short, cool, single-contact hop charge added after high krausen has fallen—roughly 24 to 72 hours before packaging. That window extracts the oils you want, gives yeast a little time for biotransformation, and limits the grassy, vegetal notes that creep in past four or five days.
Real talk: I've tried the long soak, the active-fermentation charge, and the cold-crash trick. The short cool charge wins for most styles. It's cleaner, it's more consistent batch to batch, and it costs less in hops because you're not throwing grams away trying to compensate for a bad technique.
The short cool charge method
- Crash the beer to 14–18 °C (57–64 °F) once fermentation is done. This knocks yeast out of suspension and reduces adsorption losses.
- Purge the headspace with CO₂ before opening the fermenter. This is the step most homebrewers skip, and it's the one that matters most.
- Add 4–8 grams per litre of pellets (roughly 1.5–3 oz per 5 gallons). For a NEIPA, push to the higher end.
- Leave for 48 hours. Rouse the hops gently at 12 hours—gently. A swirl, not a shake.
- Cold crash to 2 °C for 24–48 hours, then package.
The catch? If you're dry hopping in a bucket with a wide lid, oxygen ingress will undo everything. Use a carboy, keg, or conical with a small opening, and add hops through a purged port or a hop dropper if you have one.
Dry hopping with pellets vs whole leaf: which should you use?
Pellets are the default choice for dry hopping, and for good reason. They're fresher (less surface area exposed to air), they extract faster, and you need less weight to hit the same aroma intensity. Whole leaf gives a cleaner, more delicate extraction and drops clearer because the vegetal matter is easier to remove—but leaf also soaks up more beer and oxidises faster in storage.
| Factor | Pellets (T-90) | Whole leaf |
|---|---|---|
| Extraction speed | Fast (24–48 h) | Slower (48–72 h) |
| Dose needed per 5 gal | 1.5–3 oz | 2–4 oz |
| Beer loss to absorption | Moderate | Higher |
| Clogging risk in transfer | High (pellet sludge) | Low |
| Freshness over time | Better | Worse |
| Oxygen exposure per addition | Lower | Higher (bulkier) |
My honest opinion: pellets win for anything hoppy and modern. Whole leaf has its place in cask-style ales and traditional British brewing, where the slow, gentle extraction gives that old-school earthy character. But if you're chasing a NEIPA or a West Coast IPA, pellets and a purged headspace are the winning combo.
Handling pellet sludge
Pellet dry hopping creates a thick green sludge that clogs transfer lines, fills up your racking cane, and makes you lose half a gallon of beer per batch. Two fixes that actually work:
- Bag them—a hop sock or mesh bag keeps the sludge contained. Cold crash after dry hopping and the bag settles clean.
- Cold crash hard—24 hours at near-freezing drops the pellet matter into a compact cake. Extract carefully above it.
How long to dry hop homebrew?
Dry hopping homebrew for 24 to 72 hours hits the sweet spot for most styles. Past that, you start extracting grassy, vegetal polyphenols that push the beer toward harsh and astringent. Very hoppy NEIPAs can take up to five days, but beyond that, you're not gaining anything—you're losing aroma to time and oxygen.
Cold dry hopping (at 2–4 °C) can stretch the window to four or five days because the extraction is slower, which helps keep the profile clean. Warm dry hopping (18–20 °C) extracts fast, but also pulls out the harsh stuff fast—so keep it short.
Does longer dry hopping mean more aroma?
No. It's one of the counterintuitive truths of dry hopping: more contact time does not equal more aroma. In my own split batches, a 48-hour charge consistently produced a stronger, cleaner nose than a 7-day charge from the same hops. The long soak pulled out grass and astringency that masked the fruit.
Which brings up a practical question: how do you know when to stop? Taste it. Pull a sample at 48 hours. If the aroma smells vibrant and clean, package. If it's faint, give it another 24. If it smells like cut hay, you've gone too far.
When should you dry hop beer?
You should dry hop beer after primary fermentation has slowed or finished. Dry hopping during active fermentation works for NEIPAs and other styles where you want biotransformation, but it comes with trade-offs: yeast scrubs some of the aroma as it flocculates, and hop matter can clog the krausen.
The general rule I follow:
- NEIPA / hazy styles: two charges—one at high krausen (biotransformation), one at terminal gravity (aroma).
- West Coast IPA / pale ale: one charge after the yeast drops, 24–72 hours before packaging.
- Lager / clean styles: short, cool dry hop at 2–4 °C for 48 hours, immediately before lagering.
I'll admit, for years I dry hopped everything at day one because that's what the kit instructions said. Once I started paying attention to fermentation progress instead of counting days, my hoppy beers improved more than any hop-bill change I've made.
Dry hopping during fermentation: is it worth it?
Yes, for specific styles. Active yeast converts geraniol into citronellol and other compounds that push a beer toward citrus and stone fruit. It's the technique that made hazy IPAs what they are, and it's not going away. But it requires a purged headspace, careful hop handling, and short contact time—otherwise you lose the advantage to oxidation and grass.
Double dry hopping: what it is and when it helps
Double dry hopping (DDH) is adding hops in two separate charges—usually one during fermentation and one at the end. It threads the needle on biotransformation and aroma, and it produces a rounder hop character than a single big charge. Some of the best commercial IPAs carry "DDH" on the label for exactly this reason.
The practical version for homebrewers looks like this: 4 g/L at high krausen, then another 4 g/L once the yeast has dropped and you've cold-crashed. Total dry hop stays the same. You're just splitting the charge for a different result.
Spoiler alert: DDH does not automatically make a better beer. If your oxygen control is sloppy, DDH just means two opportunities to introduce oxygen instead of one. Fix the oxygen problem first.
The oxygen problem nobody talks about enough
Dry hopping is the single biggest oxygen risk in a homebrew process. Every time you open the fermenter to add hops, you're introducing air. Every hop addition itself carries oxygen bound to the plant matter. And every gram of oxygen you introduce during dry hopping oxidises the aroma compounds you're trying to preserve.
The result? A beer that smells incredible at dry hop time, then fades to cardboard within two weeks in the bottle. Sound familiar?
Three fixes, in order of impact:
- Purge headspace before every hop addition. CO₂ is cheap. Use it.
- Add hops through a sealed port or use a hop dropper. Never open a wide lid if you can avoid it.
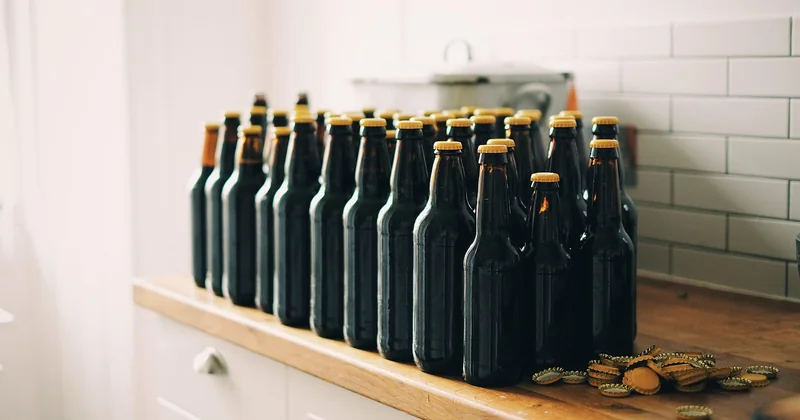
- Package cold and fast. Cold-crash, transfer under CO₂ pressure, and keep the finished beer cold until it's drunk.
Since implementing these three rules I've taken my own bottled IPA shelf life from about three weeks of decent aroma to more than six weeks—same recipe, same hops. That's the whole game.
Dry hopping NEIPA: special considerations
NEIPAs are the most oxygen-sensitive style in brewing, and dry hopping is where most homebrew NEIPAs die. The winning approach:
- Two charges, both purged.
- Total dry hop 12–16 g/L for a homebrew scale.
- Cold dry hop the second charge to limit grass extraction.
- Package under CO₂ pressure—bottle conditioning a NEIPA is a coin flip, and the coin usually loses.
One last thing before your next brew day
The technique that most improved my dry hopped beers wasn't a hop-bill change, a temperature tweak, or a new hop variety. It was buying a small CO₂ setup and purging my fermenter every time I opened it. If you've been chasing aroma for years and it keeps fading, your hops aren't the problem. Your air is.
Pick one change from this article and apply it to your next batch. Not three. One. Then taste the difference and decide whether it earned a permanent spot in your process. That's how technique actually develops—not from a list of rules, but from one tweak, one batch, one honest taste test at a time.